
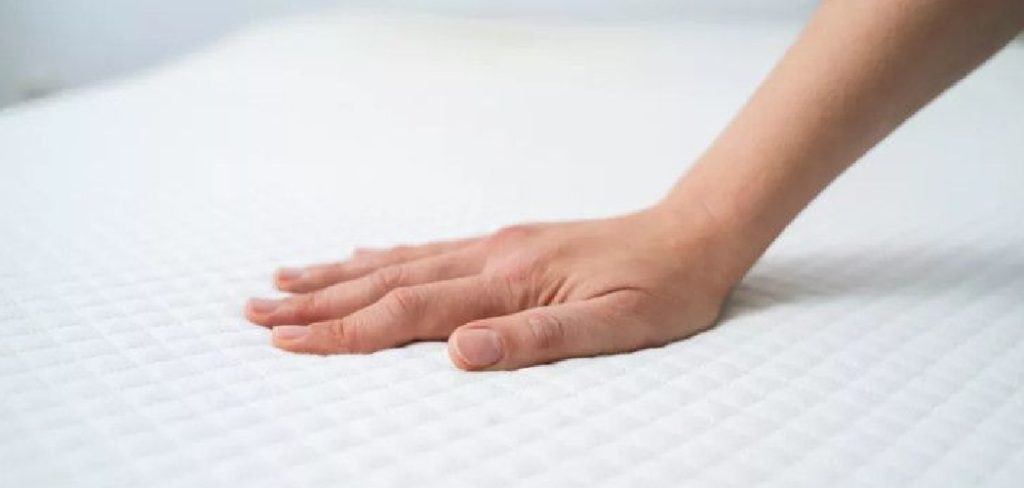
Moving or storing your mattress can be a daunting task. One of the biggest challenges is keeping it clean and protected from moisture, dust, and pests. A simple tear or stain can ruin an expensive mattress, making proper preparation essential. Learning how to wrap your mattress correctly is a skill that ensures it arrives at its destination or comes out of storage in the same condition it went in.
This guide on how to wrap mattress in plastic provides a straightforward process to protect your investment. By using the right materials and following a few simple steps, you can create a durable, sealed barrier around your mattress. We will walk you through everything from gathering supplies to sealing the final product, helping you avoid common pitfalls and ensuring your mattress remains pristine.
Tools and Materials You’ll Need
Before you begin wrapping your mattress, make sure you have the following tools and materials on hand:
- Plastic mattress bag specifically designed for your mattress size
- Duct tape or packing tape
- Scissors
- A marker or label to identify the wrapped mattress
When purchasing a plastic mattress bag, be sure to choose one that is made of durable, thick material. This will provide better protection against tears or punctures during transportation or storage.
7 Simple Step-by-step Guidelines on How to Wrap Mattress in Plastic:
Step 1: Prepare Your Workspace and Mattress
First, clear a large area on the floor, ensuring it is completely clean and dry. Any dirt, debris, or moisture on the floor could be trapped inside the mattress bag, potentially leading to mold or mildew growth over time. Remove any furniture or obstacles that might get in the way.
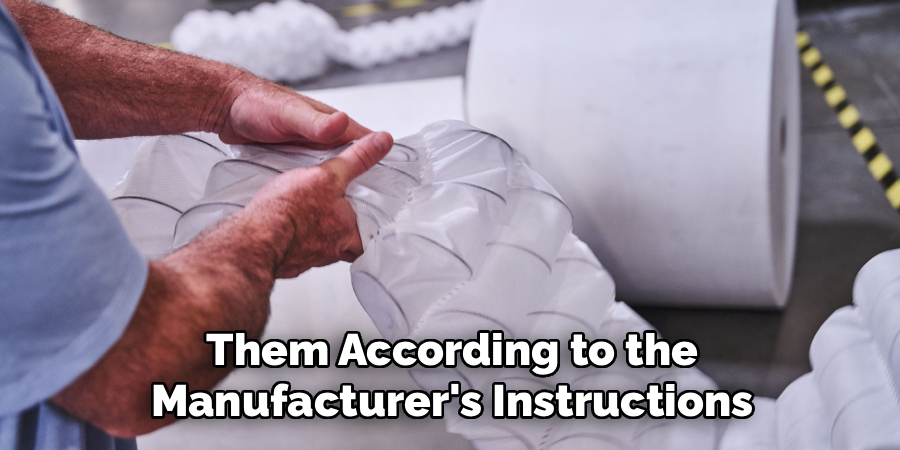
Next, strip your mattress of all bedding, including sheets, blankets, pillows, and any mattress protectors or toppers. This is also an excellent opportunity to clean your mattress. Vacuum the entire surface, including the sides, to remove any dust, hair, or allergens. If you find any stains, spot-clean them according to the manufacturer’s instructions and allow the area to dry completely before you proceed.
Once the mattress is clean and bare, move it to your prepared workspace. If you have a partner, this is the time to ask for their help. Each person can grab a corner to lift and carry the mattress to the designated spot. Lying it flat on the floor is generally the easiest way to work, but you can also lean it against a clean, sturdy wall if you have limited floor space. Ensure the wall is free of nails or sharp objects that could puncture the plastic. The goal is to have full, easy access to all sides of the mattress for a seamless wrapping process.
Step 2: Position the Mattress Bag
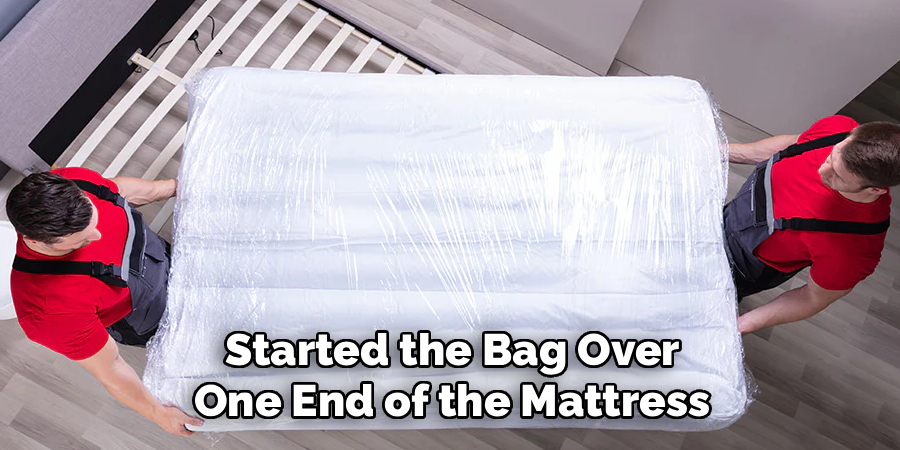
With your mattress ready, the next step is to get the plastic mattress bag into position. Unfold the bag and open it up. Most mattress bags are gusseted, meaning they have folds on the sides that allow them to expand to fit the mattress’s depth. Identify the opening of the bag. If you are working alone, the easiest method is to prop the mattress upright against a wall. You can then slide the bag down over the top of the mattress, a bit like putting on a giant sock. Work it down slowly and evenly on both sides to avoid tearing the plastic.
If you have a partner, the process is even simpler. With the mattress lying flat on the floor, one person can lift one end of the mattress a few inches off the ground. The other person can then start sliding the open end of the bag onto the lifted end of the mattress.
Work together to shimmy the bag down the length of the mattress until it is completely enveloped. Be careful not to drag the mattress too much, as this can create friction and potentially rip the bag. The key is to slide the bag over the mattress, not drag the mattress into the bag. Make sure the bag is centered and there is a similar amount of excess plastic at both ends.
Step 3: Slide the Mattress Completely into the Bag
Once you have started the bag over one end of the mattress, you need to work it all the way on. If you are propping the mattress against a wall, continue to wiggle the bag downwards, alternating from side to side to keep it even. Gravity will be your friend here, but gentle guidance is needed to prevent snags. If the mattress is heavy, you may need to periodically adjust its position to release any tension on the plastic. Continue this process until the entire mattress is inside the bag and resting at the bottom.
If you are working with a partner and the mattress is on the floor, continue the shimmying motion. One person should hold the bag open while the other gently pushes the mattress further inside. You can also try a “caterpillar” method, where you create small waves in the mattress to inch it forward into the bag.
Once the mattress is fully inside, lay it flat on the floor again. Take a moment to adjust the bag so that it is smooth and flat against the mattress surfaces, pushing out any large pockets of air. This will make the final sealing step much easier and create a tighter, more secure package for transport.
Step 4: Expel Excess Air from the Bag
Before you seal the bag, it is important to remove as much excess air as possible. Trapped air can cause the plastic to billow, making the mattress difficult to grip and carry. It also creates a less stable package that can shift during a move. To remove the air, leave a small opening at the end of the bag and gently press down on the surface of the mattress, starting from the closed end and working your way toward the opening. You can use your hands, forearms, or even carefully kneel on the mattress to push the air out.
Think of it like burping a giant food storage bag. As you apply pressure, you will see the plastic shrink and conform to the shape of the mattress. Have your partner help by holding the opening steady while you push the air toward them. Once you have removed the majority of the air, the mattress bag should be snug.
Do not aim to create a perfect vacuum seal unless you have a specialized vacuum-seal bag; simply removing the bulk of the air is sufficient. This step not only makes the mattress more compact and manageable but also reduces the risk of the bag being punctured by loose, flapping plastic.
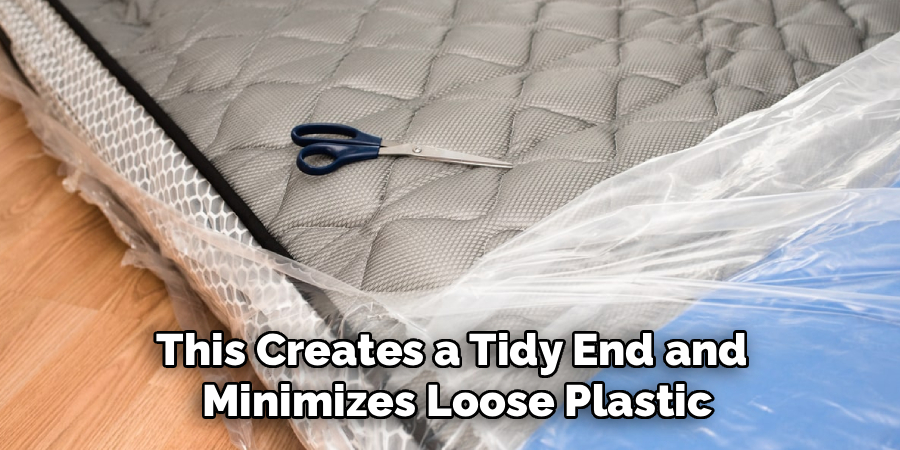
Step 5: Seal the Open End with Packing Tape
Now that the excess air is removed, it is time to create a strong, airtight seal. Start by folding the excess plastic at the open end of the bag down neatly, like you are wrapping a present. Fold the corners in to create a clean, triangular flap, then fold the flap down over the end of the mattress. This creates a tidy end and minimizes loose plastic. Have your partner hold this flap securely in place while you grab your packing tape. Run a long strip of tape along the entire seam where the folded plastic meets the body of the bag.
Do not stop with just one piece of tape. For a truly secure seal that will hold up during a move or in storage, you need to be generous with the tape. Apply several overlapping strips of tape across the entire width of the mattress end. Then, run additional strips perpendicular to the first set, creating a cross-hatch pattern for extra reinforcement. Pay special attention to the corners, as these are often high-stress points. The goal is to create a seal that is completely airtight and water-resistant, protecting your mattress from dust, moisture, and pests.
Step 6: Reinforce the Entire Mattress Bag
A single layer of plastic, even thick plastic, can be vulnerable to rips and tears, especially around corners and edges. To provide maximum protection, you should reinforce the entire wrapped mattress with packing tape. This creates a sort of external skeleton that adds structure and durability. Start by running long strips of tape along all four long edges of the mattress. This will help protect the seams of the bag and the edges of the mattress from impact. Be sure to press the tape down firmly to ensure it adheres well to the plastic.
Next, wrap tape around the corners, which are the most susceptible to damage. You can create an “X” pattern over each corner or wrap tape around them several times. Finally, consider wrapping bands of tape around the entire circumference of the mattress at several points—one near the top, one in the middle, and one near the bottom. This adds another layer of security, prevents the plastic from shifting, and can even provide a better grip for carrying. While this step uses a lot of tape, the extra protection is well worth it to safeguard your valuable mattress.
Step 7: Label the Wrapped Mattress
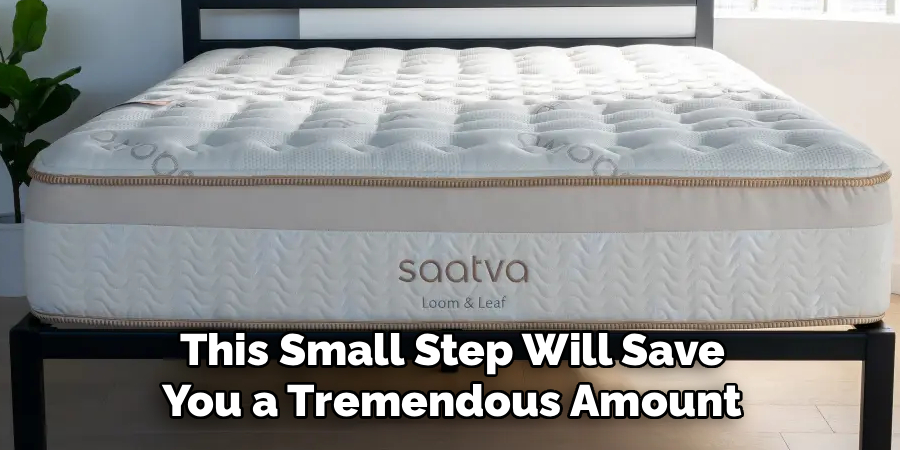
The final step is simple but crucial: labeling. Once your mattress is fully wrapped and reinforced, take a permanent marker and label it clearly. Write the size of the mattress (e.g., “Queen” or “King”) and the room it belongs to (e.g., “Master Bedroom”) in large, bold letters on both sides of the wrapped mattress. This small step will save you a tremendous amount of time and confusion on moving day. Movers will know exactly where to place it, and you will not have to guess which mattress goes in which room.
If the mattress is going into storage, labeling is even more important. In addition to the size, you might want to add the date it was stored. If you have multiple mattresses in storage, this helps you quickly identify the one you need without having to unwrap everything. Proper labeling streamlines the moving and unpacking process, reducing stress and ensuring your belongings end up in the right place. It is a simple finishing touch that completes the job and makes your future self very grateful.
Following these steps on how to wrap mattress in plastic, ensures that your mattress is safe and secure during storage. This process may seem tedious, but it will save you time and money in the long run. Taking the extra precautions to properly wrap your mattress will protect it from damage or wear and tear while in storage.
Common Mistakes to Avoid
- Use a cheap, thin plastic bag that tears easily during the move.
- Forgetting to remove all air before sealing creates a bulky, awkward package.
- Skimping on packing tape results weak seal that can open up.
- Dragging the mattress on the ground can puncture the plastic bag.
- Not cleaning and completely drying the mattress before wrapping it for storage.
How Much Will It Cost?
The cost of wrapping a mattress is quite low, especially when compared to the cost of replacing it. The primary expense is the mattress bag itself. A good quality, heavy-duty plastic mattress bag typically costs between $10 and $25, depending on the size and thickness. You can often find them in multi-packs or as part of a moving kit, which can offer better value. High-quality packing tape is the other main cost.
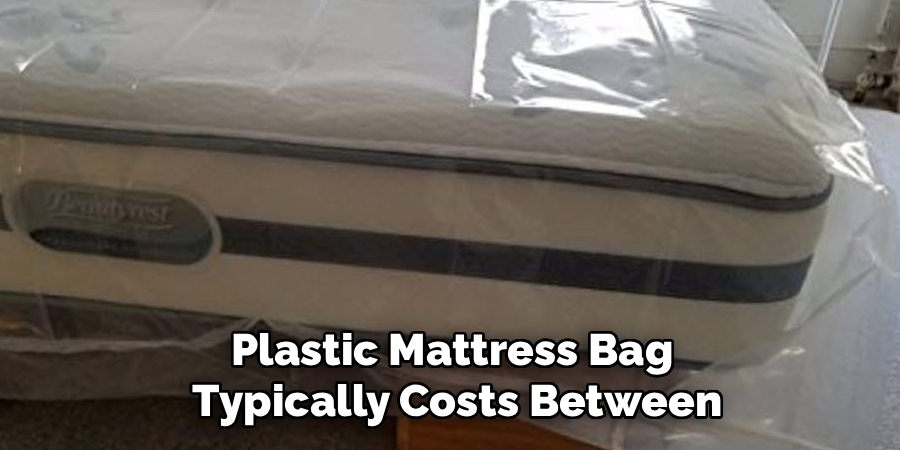
A large roll of strong packing tape costs around $5 to $8, and you will likely use at least one full roll, possibly two for extra reinforcement. Therefore, you can expect the total cost to be anywhere from $15 to $40 for a single mattress. It’s a small price to pay for the peace of mind that comes with knowing your mattress is protected from dirt, moisture, and damage.
Frequently Asked Questions
H3: Can I Use Regular Plastic Sheeting Instead of a Mattress Bag?
While you can technically use regular plastic sheeting and tape to create a makeshift cover, it is generally not recommended. Mattress bags are specifically designed for this purpose; they are gusseted to fit the depth of a mattress and are made from a more durable, puncture-resistant plastic.
Creating a fully sealed, waterproof enclosure with sheeting is difficult and time-consuming. You are more likely to have gaps, weak spots, and seams that come apart during a move, leaving your mattress vulnerable to dirt and moisture. Investing in a proper mattress bag is the most reliable way to ensure complete protection.

H3: How Do I Protect a Box Spring?
You should protect your box spring the same way you protect your mattress. Box springs are also susceptible to dirt, moisture, and structural damage during a move. Most companies that sell mattress bags also sell them in box spring sizes, which are typically thinner. Alternatively, you can often purchase a two-pack that includes a bag for both the mattress and the box spring. Follow the exact same steps: slide the box spring into the bag, remove excess air, seal it tightly with packing tape, and reinforce the edges and corners. This ensures both pieces of your bed set are equally protected.
H3: Is It Okay to Fold a Mattress After Wrapping It?
Whether you can fold your mattress depends entirely on its type. Most traditional innerspring mattresses should never be folded, as this can permanently damage the springs and border rods. However, most memory foam, latex, and hybrid mattresses can be carefully folded or bent for a short period to get them through tight spaces like narrow doorways or stairwells. If you do need to fold it, do so after it is securely wrapped in plastic. The reinforced tape will help support the mattress and prevent the fold from being too sharp. Only keep it folded for as little time as possible.
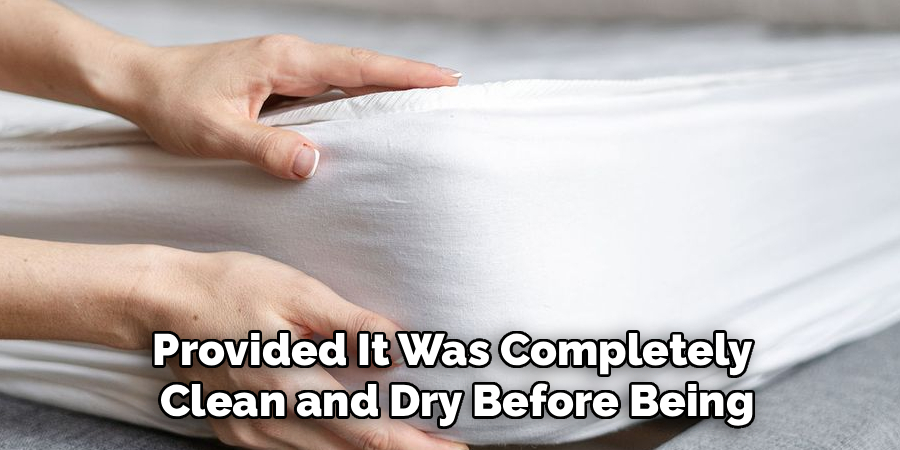
H3: How Long Can I Keep a Mattress Wrapped in Plastic for Storage?
You can keep a mattress wrapped in plastic for long-term storage, provided it was completely clean and dry before being sealed. The airtight seal will protect it from dust, pests, and ambient moisture. For best results, store the mattress flat in a climate-controlled storage unit rather than an attic or basement where extreme temperature fluctuations can cause condensation inside the bag. Storing it flat prevents any distortion or stress on the internal components. When stored properly, a mattress can remain wrapped for several years without issue.
Conclusion
Protecting your mattress during a move or for storage is a simple but vital task. By investing a small amount of time and money in the right materials, you can safeguard one of your most important home furnishings from damage. Following a systematic approach on how to wrap mattress in plastic—from preparing your workspace and cleaning the mattress to carefully sealing and reinforcing the bag—ensures a secure, durable result.
Remember that a partner can make the process significantly easier, and generosity with high-quality packing tape is key to a truly resilient seal. By avoiding common mistakes and following these detailed steps, your mattress will be fully protected, ready for transport or storage, and will arrive in perfect condition.
About
Construct Fixes is a distinguished figure in the world of Diy design, with a decade of expertise creating innovative and sustainable Diy solutions.
His professional focus lies in merging traditional craftsmanship with modern manufacturing techniques,
fostering designs that are both practical and environmentally conscious. As the author of diy,
constructfixes delves into the art and science of construction-making, inspiring artisans and industry professionals alike.
Education RMIT University
(Melbourne, Australia) Associate Degree in Design (Construct Fixes) Focus on sustainable design, industry-driven projects,
and practical craftsmanship. Gained hands-on experience with traditional and digital manufacturing tools, such as CAD and CNC software.
Nottingham Trent University
(United Kingdom) Bachelor’s in constructfixes.com and Product Design (Honors) Specialized in product design with a focus on blending creativity with production
techniques. Participated in industry projects, working with companies like John Lewis and Vitsoe to gain real-world insights.
Publications and Impact
In diy, Construct Fixes his insights on indoor design processes, materials, and strategies for efficient production.
His writing bridges the gap between artisan knowledge and modern industry needs, making it a must-read for both budding designers and seasoned professionals.