
A comfortable mattress is one of the most important factors in achieving restful, rejuvenating sleep. Over time, however, even the highest-quality mattresses can develop lumps, dips, or uneven patches. These imperfections can disrupt your sleep, cause aches and pains, and even impact your mood and productivity throughout the day.
Understanding the causes and solutions for a lumpy mattress is key to extending its lifespan and ensuring your health and comfort. Whether you’re waking up sore or simply tired of tossing and turning, there are actionable steps you can take to restore your mattress to its former glory. With the right approach and a little determination, you don’t have to resign yourself to poor sleep any longer. In this article on how to fix a lumpy mattress, we’ll cover the main causes of lumps in your mattress and provide practical tips for resolving them.
Causes of a Lumpy Mattress
There are several possible reasons why your mattress may have developed lumps over time. One of the most common causes is uneven distribution of weight, which can happen if you tend to sleep in the same position every night or if your partner has a significantly different body shape than you do. This can cause certain areas of the mattress to become compressed and lose their original support, resulting in lumpy spots.
Another potential cause could be an aging mattress that has exceeded its lifespan. Most mattresses are designed to last for around 8 years, but factors such as daily wear and tear, lack of proper maintenance, and exposure to moisture or heat can shorten their lifespan and lead to lumps.
Tools and Materials You’ll Need
Before you start fixing your lumpy mattress, gather the necessary tools and materials. Having everything within reach will streamline the process and help you achieve the best possible results. Most of these items are commonly found around the house, but a few might require a trip to your local home store.

- Vacuum cleaner with upholstery attachment
- Mattress topper or pad (optional but recommended)
- Soft bristle brush
- Clean towels or blankets
- Wooden or plastic slats (for additional support if using a slatted bed frame)
- Mild soap and water for cleaning
- Dryer balls (if you plan to fluff a foam or fiber-filled mattress)
By preparing these tools before you begin, you’ll be able to tackle the task efficiently and prevent unnecessary interruptions or delays.
7 Simple Step-By-Step Guidelines on How to Fix a Lumpy Mattress
Step 1: Remove All Bedding and Inspect the Mattress
Start your lumpy mattress repair by stripping all bedding, pillows, and mattress protectors. This gives you an unobstructed view of the entire mattress surface and allows you to spot lumps, dips, or uneven spots more easily.
Once the mattress is bare, run your hands gently but thoroughly over the entire surface. Focus on areas where you typically sleep, as these are the likeliest to develop issues. Visual inspection combined with tactile examination will help you identify both visible and hidden problem spots.
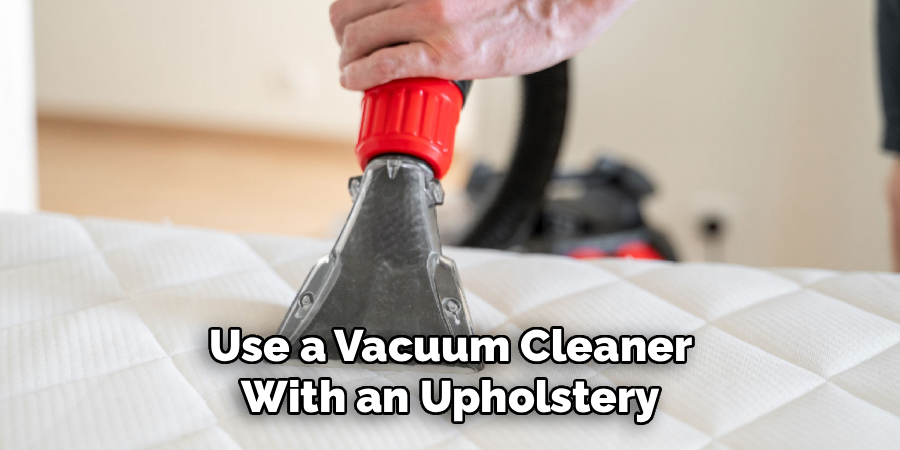
Step 2: Vacuum and Clean the Mattress Surface
Before attempting any repairs, it’s essential to clean your mattress. Use a vacuum cleaner with an upholstery attachment to remove dust, dirt, and allergens that may have accumulated on the surface and within crevices.
If you notice any stains or spills, mix a small amount of mild soap with water, dip a clean cloth in the solution, and gently blot the stained area. Avoid soaking the mattress, as excessive moisture can lead to mold growth. Let the cleaned areas air dry fully before moving to the next step.
Step 3: Rotate and Flip the Mattress (If Possible)
Mattress rotation and flipping are proven strategies for preventing and addressing lumpiness. If your mattress design allows, flip it over so the bottom side becomes the top. Additionally, rotate it 180 degrees to distribute wear more evenly.
For mattresses that are single-sided or contain specific support layers, only rotation may be possible. Be sure to follow the manufacturer’s instructions regarding flipping or rotating to avoid damaging the internal structure. This step helps counteract indentations and can immediately improve comfort.
Step 4: Use Physical Pressure to Disperse Lumps
If certain spots of your mattress feel especially lumpy, apply gentle physical pressure to redistribute the filling. Use your hands to knead or massage the lumpy areas, pushing the excess material toward the mattress edges or corners where settling is less problematic.

In some cases, standing or gently walking (in socks) on the lump can help even out foam or fiberfill. Be careful not to damage inner coils or springs, especially in hybrid or innerspring mattresses. Take your time and check your progress frequently to ensure an even surface.
Step 5: Add Support With a Mattress Topper or Pad
Sometimes, adding an extra layer of cushioning is the best solution for persistent lumps. A high-quality mattress topper or pad can offer a smoother, more even sleeping surface and help mask minor imperfections in the underlying mattress.
Choose memory foam, latex, or fiberfill toppers depending on your comfort preferences. Not only do toppers improve comfort, but they can also extend the life of your mattress by distributing pressure more evenly. Make sure the topper is properly positioned and secured beneath your fitted sheet.
Step 6: Reinforce Your Bed Frame or Foundation
Lumpiness is sometimes the result of inadequate support from below. Check your bed frame, box spring, or foundation to ensure it is providing even, stable support across the entire mattress. Look for broken slats, sagging, or uneven surfaces.
If you find any issues, repair the foundation by replacing broken components or adding new slats or plywood. An uneven base can exacerbate mattress lumps, so reinforcing your support system can make a substantial difference to comfort and longevity.
Step 7: Fluff and Air Out the Mattress
Finally, give your mattress a chance to recover its shape by fluffing and airing it out. If you have a foam or fiber-filled mattress, repeatedly lift and drop it from a short height or use dryer balls to beat down and spread filling more evenly (ensure the manufacturer allows this).
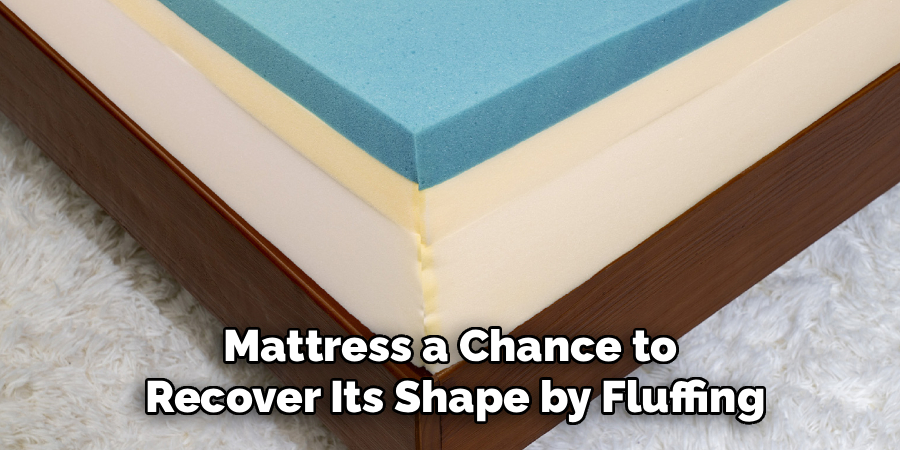
Let the mattress rest in a well-ventilated room for several hours or even a whole day. This helps to eliminate odors and moisture while encouraging the internal structure to even out further, giving you a fresher and more comfortable bed.
Following these steps on how to fix a lumpy mattress can help restore your bed to its former comfort and make it feel like new again. However, if these methods do not work, it may be time to consider investing in a new mattress.
Do You Need To Use Professionals?
In situations where your mattress remains lumpy after following all these steps, you might wonder if hiring a professional is necessary. The answer depends on the severity of the lumpiness, the age of your mattress, and your budget. Professional services can include deep cleaning, structural repairs, or even mattress re-stuffing for certain types of bedding.
Generally, calling in professionals makes sense if your mattress is expensive or still under warranty, or if the lumps are severe enough to affect your health. They have specialized tools and knowledge to address complex problems that aren’t possible to fix at home. However, keep in mind that spending money on professional repairs may not always be cost-effective—especially if the mattress has surpassed its typical lifespan.
Before choosing to work with a professional, weigh the cost of repairs against the price of a new or replacement mattress. While fixing some issues is beneficial, sometimes investing in a new mattress will be more practical and economical in the long run.
How Much Will It Cost?
The cost of fixing a lumpy mattress varies greatly based on the method you choose. DIY approaches, using basic cleaning supplies and a mattress topper, can range from $20 to $150. This is an affordable solution, especially if your mattress is still in reasonable condition and only needs minor adjustments.
If you opt for more extensive fixes, such as professional repairs or refurbished internal components, the price can rise to $200 or more. In cases where the issues stem from the bed frame or foundation, additional expenses may be involved. Always compare these costs to the price of a brand-new mattress, which typically starts around $300 for basic models and goes up from there.
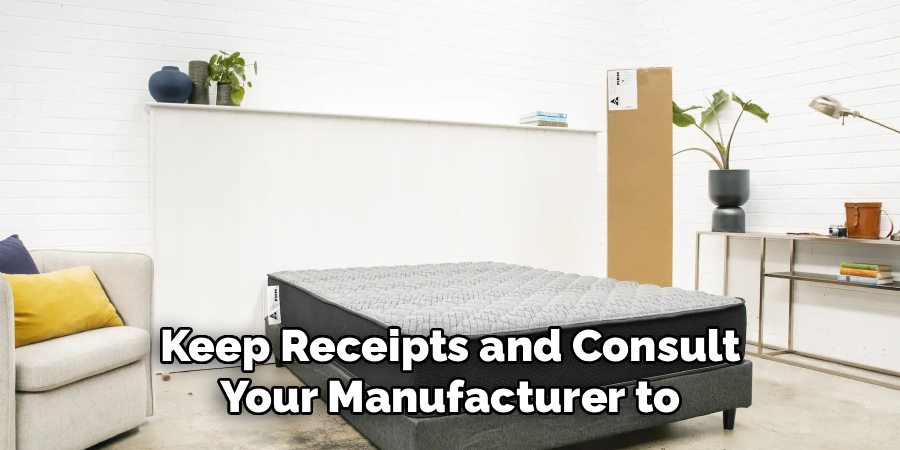
Consider your warranty as well—if your mattress is still covered, certain repairs may be free or discounted. Keep receipts and consult your manufacturer to determine the best financial decision for your situation.
Frequently Asked Questions
Q1: What Causes a Mattress to Become Lumpy?
Lumpiness usually results from frequent use, uneven wear, or shifting of internal materials, such as foam, fiberfill, or springs. Over time, weight distribution and lack of rotation can cause certain areas to compress faster than others, forming dips and peaks.
Other contributing factors include a poorly supported bed frame or foundation and exposure to moisture, which can degrade the mattress layers. Regular maintenance can significantly slow down the onset of lumpiness and extend your mattress’s usability.
Q2: How Often Should I Rotate or Flip My Mattress?
Most mattress experts recommend rotating your mattress every three to six months, even if the manufacturer does not specifically require it. If your mattress is designed to be flippable, turning it over at the same interval can help maintain an even surface.
Consistent rotation helps distribute body weight more uniformly, reducing pressure points and delaying the formation of lumps or sags. Always follow the care guidelines provided by your mattress manufacturer to avoid voiding your warranty.
Q3: Can a Mattress Topper Fix All Types of Lumpiness?
Mattress toppers can help with minor to moderate lumpiness, providing an extra layer of cushioning that smooths out uneven spots. However, they may not be effective for mattresses with severe indentations, broken springs, or major structural problems.
If a topper alone doesn’t solve the issue, consider combining it with regular rotation, foundation reinforcement, and other repair steps. In cases of significant damage, replacing the mattress itself might be the better option.
Q4: Is It Worth Fixing an Old Mattress, or Should I Replace It?
This decision depends on several factors, including the age, type, and condition of your mattress. If your mattress is less than seven years old and only has minor lumps, repairs are usually worthwhile. For mattresses older than eight to ten years, or those with persistent discomfort after repairs, replacement is often the best choice.
Take into account your comfort, sleep quality, and any recurring pain when deciding whether to repair or replace. Investing in a new mattress can dramatically improve your wellbeing if ongoing issues persist.
Conclusion
A lumpy mattress doesn’t have to mean sleepless nights and sore mornings. By following these step-by-step guidelines on how to fix a lumpy mattress, you can often restore comfort and function to your mattress with minimal expense. Regular maintenance—like rotating, cleaning, and using mattress toppers—can greatly extend the life of your bed and keep it comfortable for years to come.
While some severe mattress issues may require a professional touch, most lumps are manageable with everyday household tools and a bit of patience. Remember, your well-being and rest are valuable, and even small changes to your sleep environment can make a big difference in your daily life. Take action today and rediscover what it feels like to sleep on a truly comfortable mattress.
About
Construct Fixes is a distinguished figure in the world of Diy design, with a decade of expertise creating innovative and sustainable Diy solutions.
His professional focus lies in merging traditional craftsmanship with modern manufacturing techniques,
fostering designs that are both practical and environmentally conscious. As the author of diy,
constructfixes delves into the art and science of construction-making, inspiring artisans and industry professionals alike.
Education RMIT University
(Melbourne, Australia) Associate Degree in Design (Construct Fixes) Focus on sustainable design, industry-driven projects,
and practical craftsmanship. Gained hands-on experience with traditional and digital manufacturing tools, such as CAD and CNC software.
Nottingham Trent University
(United Kingdom) Bachelor’s in constructfixes.com and Product Design (Honors) Specialized in product design with a focus on blending creativity with production
techniques. Participated in industry projects, working with companies like John Lewis and Vitsoe to gain real-world insights.
Publications and Impact
In diy, Construct Fixes his insights on indoor design processes, materials, and strategies for efficient production.
His writing bridges the gap between artisan knowledge and modern industry needs, making it a must-read for both budding designers and seasoned professionals.