
Dust mites are microscopic pests that thrive in warm, humid environments—unfortunately, your mattress is one of their favorite places to call home. These unwelcome guests feed on dead skin cells and tend to multiply quickly, often going unnoticed until they start triggering allergies or affecting your sleep quality. For households with allergy sufferers or asthma, controlling dust mite populations is crucial in maintaining a healthy indoor environment.
Though nearly impossible to eliminate every single dust mite, you can dramatically reduce their numbers with consistent maintenance and the right approach. The steps on how to get rid of dust mites in mattress you take will not only provide relief from sneezing, coughing, and other allergies but will also improve the overall hygiene and lifespan of your mattress. Let’s dive into how you can efficiently evict dust mites from your sleeping space.
Tools and Materials You’ll Need
Before you begin, gather these tools and supplies to ensure a thorough and effective cleaning process:
- A powerful vacuum cleaner with a HEPA filter
- Mattress encasements or hypoallergenic covers
- Baking soda
- Mild laundry detergent
- Hot water (at least 130°F / 54°C)
- Upholstery or steam cleaner (optional, but highly effective)
- Soft, clean cloths or microfiber towels
- Disposable gloves and a protective mask (if you have allergies)
- Essential oils like eucalyptus or tea tree (optional for added freshness)
Having everything ready before you start will streamline the process and help you avoid missing any important steps.
8 Simple Step-By-Step Guidelines on How to Get Rid of Dust Mites in Mattress
Step 1: Remove All Bedding and Wash Thoroughly
Begin by stripping your bed of sheets, pillowcases, blankets, mattress protectors, and any additional bedding. Place these items directly into your laundry basket, being careful not to shake them excessively—shaking could release dust mites into the air. Gather any stuffed toys or decorative pillows that also reside on the bed.

To effectively kill dust mites, wash all bedding in hot water at a minimum of 130°F (54°C). If any items are not suitable for high heat, consider using allergy-friendly laundry additives. Dry everything on the hottest setting your fabrics will tolerate. This simple but essential step is the foundation for removing allergens from your sleeping space.
Step 2: Vacuum the Mattress Thoroughly
Once the bedding is out of the way, use a vacuum cleaner equipped with a HEPA filter to clean all sides of the mattress. Pay special attention to seams, crevices, and any buttons or tufted areas, as these places can harbor large numbers of dust mites and their debris. Make multiple slow passes over the surface to ensure the vacuum picks up as many particles as possible.
Don’t forget to vacuum the surrounding areas, including the bed frame, base, and nearby carpets or rugs. HEPA filters are essential because they can trap microscopic particles that standard vacuums might release back into the air. Consistent, thorough vacuuming greatly reduces dust mite populations.
Step 3: Sprinkle Baking Soda and Let It Sit
After vacuuming, sprinkle a generous layer of baking soda over the entire surface of the mattress. Baking soda works as a natural deodorizer, absorbing odors, moisture and helping to neutralize allergens. For added antibacterial properties, you can mix a few drops of eucalyptus or tea tree oil with the baking soda before application.
Allow the baking soda to sit for at least 30 minutes, though leaving it for a few hours or even overnight is best for optimal results. This waiting period gives the baking soda more time to draw out moisture and odors, making it easier for you to maintain a fresh and clean mattress. Afterward, vacuum the mattress again to remove all of the baking soda residue.
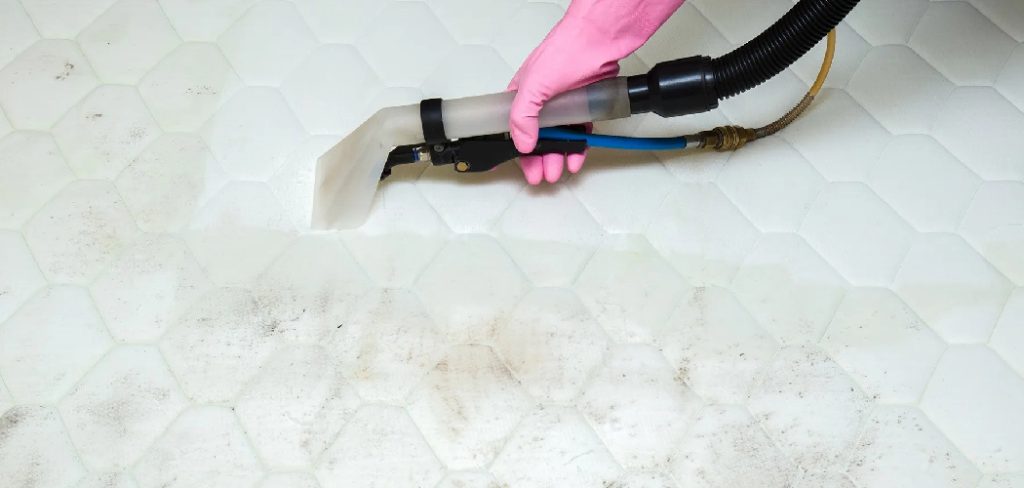
Step 4: Use Steam or Hot Water Cleaning
Where possible, use a handheld steam cleaner or upholstery steamer on your mattress. Steam at a temperature of at least 130°F (54°C) instantly kills dust mites and can penetrate deep into the mattress fibers, where mites often hide. If you don’t own a steamer, consider renting one or hiring a professional cleaning service for particularly severe infestations.

Work slowly and evenly across the mattress, allowing the steam to target all areas. Make sure your mattress is compatible with moisture and heat—consult the manufacturer’s instructions beforehand. After steaming, let the mattress dry thoroughly; a damp mattress can invite mold and bacteria, causing new problems down the road.
Step 5: Let the Mattress Air Out in Sunlight
Whenever the weather allows, take your mattress outside and place it in direct sunlight. Ultraviolet (UV) rays not only help to kill dust mites but also inhibit the growth of bacteria and mold spores. Sunlight dries out the mattress naturally, making it a hostile environment for mites, which thrive in damp or humid conditions.
If moving the mattress outdoors isn’t practical, open your bedroom windows thoroughly to maximize natural light and ventilation. Aim to air out your mattress at least a few times a year, particularly in humid climates, to maintain a fresh and mite-resistant sleeping surface.
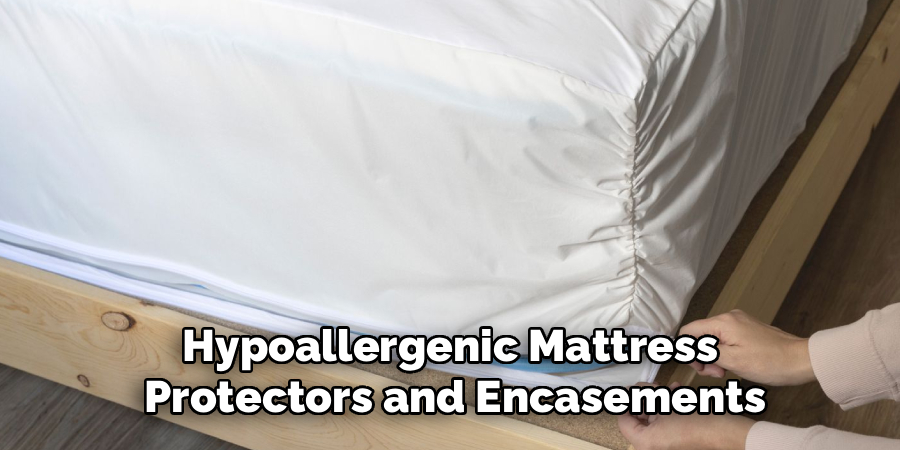
Step 6: Apply Mattress Encasements
Once your mattress is completely dry, cover it with a high-quality, hypoallergenic mattress encasement. These specially designed covers create a barrier that dust mites cannot penetrate, effectively trapping any remaining mites inside and preventing new ones from entering. Choose a tightly woven encasement made of breathable fabric for both comfort and protection.
Regularly wash mattress encasements in hot water alongside your bedding. Using encasements doesn’t remove the need for cleaning, but it does significantly reduce allergen exposure and make future maintenance much easier. For optimal results, consider encasing both your mattress and pillows.
Step 7: Regular Cleaning and Maintenance
Establish a schedule to clean and maintain your mattress routinely. Vacuum the mattress every two to four weeks, and do a deep clean, including baking soda treatment and steam cleaning, every few months or as needed. Keep bedding washed weekly in hot water to disrupt dust mite life cycles consistently.
In addition, regularly clean bedroom curtains, carpets, and upholstered furniture, as dust mites can migrate from these areas. Keeping humidity below 50% with a dehumidifier can also make your bedroom less welcoming to dust mites in the long term.

Step 8: Adopt Additional Preventive Measures
Incorporate further preventive steps such as minimizing clutter and plush surfaces that collect dust. Avoid placing items under the bed that can harbor dust and limit the use of heavy drapes or thick rugs.
Consider using an air purifier equipped with a HEPA filter in your bedroom to continuously remove dust and allergens from the air. Educate your family or roommates about dust mite prevention and make mattress cleaning a shared responsibility, ensuring everyone enjoys a healthier home environment.
Following these steps on how to get rid of dust mites in mattress and bedding can greatly reduce the number of dust mites in your home, providing relief for those with allergies and asthma. Taking proactive measures to prevent dust mite infestations is key to maintaining a clean and healthy living space.
Common Mistakes to Avoid
Many people neglect the importance of using hot water, which is crucial for killing dust mites in bedding and covers. Failing to let the mattress dry thoroughly can lead to mold or bacteria growth, compounding your allergy issues.
Infrequent cleaning and skipping mattress encasements also allow dust mites to thrive. Remember to clean adjacent areas, as dust mites can easily travel from carpets or curtains. Lastly, avoid underestimating the impact of consistent preventive measures.
Frequently Asked Questions
Q1: How Often Should I Clean My Mattress to Keep Dust Mites Away?
To minimize dust mite populations, aim to clean your mattress thoroughly every two to three months, incorporating vacuuming, baking soda treatments, and, if possible, steam cleaning. For households with severe allergies or pets, consider cleaning more frequently. Regularly washing bedding and encasements in hot water weekly will also help keep mite numbers in check. Consistency is key to maintaining a healthier and more comfortable sleeping space.
Q2: Do Mattress Protectors Really Help Against Dust Mites?
Yes, high-quality, hypoallergenic mattress protectors and encasements are highly effective at keeping dust mites out of your mattress. These covers trap existing mites inside and prevent new infestations by blocking access to food sources, like dead skin cells. For best results, use protectors on both mattresses and pillows, and wash them frequently using hot water. While protectors make maintenance easier, they should always be used alongside regular cleaning routines.
Q3: Can I Get Rid of Dust Mites Without Professional Help?
Absolutely. Most dust mite cleaning and prevention strategies can be carried out at home with the right tools and consistency. Vacuuming with a HEPA filter, using hot water for laundering, and employing baking soda or steam can significantly reduce mite populations. Professionals may be helpful for severe infestations or if you lack certain equipment, but in most cases, dedicated home care is sufficient. Protecting your mattress with covers and regular upkeep is essential.
Q4: Are There Natural Remedies for Reducing Dust Mites?
Yes, several natural remedies can help minimize dust mites. Baking soda and essential oils like eucalyptus or tea tree oil have mild antimicrobial properties that deter mites and freshen up your sleep environment. Airing out your mattress in sunlight and using dehumidifiers to lower humidity levels also work well. Remember, natural remedies are most effective when used in combination with thorough cleaning and protective covers rather than as substitutes.
Conclusion
Eliminating dust mites from your mattress is a process that requires diligence, the right tools, and a commitment to regular cleaning. By following the detailed steps on how to get rid of dust mites in mattress above, you not only reduce allergens and respiratory triggers but also improve the overall cleanliness of your sleep environment. Remember to avoid common pitfalls, use mattress encasements, and follow preventive measures for best results.
Maintaining a dust-mite-free mattress isn’t a one-time effort. Continued care—cleaning bedding in hot water, using HEPA-filtered vacuums, and keeping your bedroom well-ventilated—will ensure your hard work pays off. Take these actions seriously, and you can rest easy knowing your mattress is not just clean but also healthier for you and your loved ones.
About
Construct Fixes is a distinguished figure in the world of Diy design, with a decade of expertise creating innovative and sustainable Diy solutions.
His professional focus lies in merging traditional craftsmanship with modern manufacturing techniques,
fostering designs that are both practical and environmentally conscious. As the author of diy,
constructfixes delves into the art and science of construction-making, inspiring artisans and industry professionals alike.
Education RMIT University
(Melbourne, Australia) Associate Degree in Design (Construct Fixes) Focus on sustainable design, industry-driven projects,
and practical craftsmanship. Gained hands-on experience with traditional and digital manufacturing tools, such as CAD and CNC software.
Nottingham Trent University
(United Kingdom) Bachelor’s in constructfixes.com and Product Design (Honors) Specialized in product design with a focus on blending creativity with production
techniques. Participated in industry projects, working with companies like John Lewis and Vitsoe to gain real-world insights.
Publications and Impact
In diy, Construct Fixes his insights on indoor design processes, materials, and strategies for efficient production.
His writing bridges the gap between artisan knowledge and modern industry needs, making it a must-read for both budding designers and seasoned professionals.